6.0KB
+++ title = “Image processing” weight = 120 +++
Zola provides support for automatic image resizing through the built-in function resize_image,
which is available in template code as well as in shortcodes.
The function usage is as follows:
resize_image(path, width, height, op, quality)
Arguments
-
path: The path to the source image relative to thecontentdirectory in the directory structure. -
widthandheight: The dimensions in pixels of the resized image. Usage depends on theopargument. -
op(optional): Resize operation. This can be one of:"scale""fit_width""fit_height""fit""fill"
What each of these does is explained below. The default is
"fill". -
format(optional): Encoding format of the resized image. May be one of:"auto""jpg""png"
The default is
"auto", this means the format is chosen based on input image format. JPEG is chosen for JPEGs and other lossy formats, while PNG is chosen for PNGs and other lossless formats. -
quality(optional): JPEG quality of the resized image, in percents. Only used when encoding JPEGs, default value is75.
Image processing and return value
Zola performs image processing during the build process and places the resized images in a subdirectory in the static files directory:
static/processed_images/
Filename of each resized image is a hash of the function arguments, which means that once an image is resized in a certain way, it will be stored in the above directory and will not need to be resized again during subsequent builds (unless the image itself, the dimensions, or other arguments are changed). Therefore, if you have a large number of images, they will only need to be resized once.
The function returns a full URL to the resized image.
Resize operations
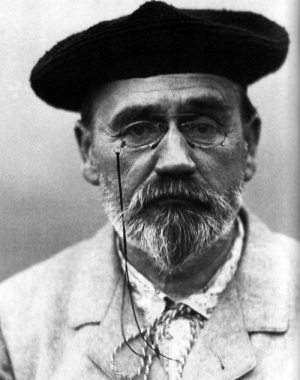
The source for all examples is this 300 × 380 pixels image:
"scale"
Simply scales the image to the specified dimensions (width & height) irrespective of the aspect ratio.
resize_image(..., width=150, height=150, op="scale")
{{ resize_image(path="documentation/content/image-processing/01-zola.png”, width=150, height=150, op="scale”) }}
"fit_width"
Resizes the image such that the resulting width is width and height is whatever will preserve the aspect ratio.
The height argument is not needed.
resize_image(..., width=100, op="fit_width")
{{ resize_image(path="documentation/content/image-processing/01-zola.png”, width=100, height=0, op="fit_width”) }}
"fit_height"
Resizes the image such that the resulting height is height and width is whatever will preserve the aspect ratio.
The width argument is not needed.
resize_image(..., height=150, op="fit_height")
{{ resize_image(path="documentation/content/image-processing/01-zola.png”, width=0, height=150, op="fit_height”) }}
"fit"
Like "fit_width" and "fit_height" combined.
Resizes the image such that the result fits within width and height preserving aspect ratio. This means that both width or height
will be at max width and height, respectively, but possibly one of them smaller so as to preserve the aspect ratio.
resize_image(..., width=150, height=150, op="fit")
{{ resize_image(path="documentation/content/image-processing/01-zola.png”, width=150, height=150, op="fit”) }}
"fill"
This is the default operation. It takes the image's center part with the same aspect ratio as the width & height given and resizes that
to width & height. This means that parts of the image that are outsize of the resized aspect ratio are cropped away.
resize_image(..., width=150, height=150, op="fill")
{{ resize_image(path="documentation/content/image-processing/01-zola.png”, width=150, height=150, op="fill”) }}
Using resize_image in markdown via shortcodes
resize_image is a built-in Tera global function (see the Templates chapter),
but it can be used in markdown, too, using Shortcodes.
The examples above were generated using a shortcode file named resize_image.html with this content:
<img src="{{ resize_image(path=path, width=width, height=height, op=op) }}" />
Creating picture galleries
The resize_image() can be used multiple times and/or in loops. It is designed to handle this efficiently.
This can be used along with assets page metadata to create picture galleries.
The assets variable holds paths to all assets in the directory of a page with resources
(see assets colocation): if you have files other than images you
will need to filter them out in the loop first like in the example below.
This can be used in shortcodes. For example, we can create a very simple html-only clickable
picture gallery with the following shortcode named gallery.html:
{% for asset in page.assets %}
{% if asset is matching("[.](jpg|png)$") %}
<a href="{{ get_url(path=asset) }}">
<img src="{{ resize_image(path=asset, width=240, height=180, op="fill") }}" />
</a>
 
{% endif %}
{% endfor %}
As you can notice, we didn't specify an op argument, which means it'll default to "fill". Similarly, the format will default to
"auto" (choosing PNG or JPEG as appropriate) and the JPEG quality will default to 75.
To call it from a markdown file, simply do:
{{/* gallery() */}}
Here is the result:
{{ gallery() }}
Image attribution: Public domain, except: _06-example.jpg_: Willi Heidelbach, _07-example.jpg_: Daniel Ullrich.Get image size
Sometimes when building a gallery it is useful to know the dimensions of each asset. You can get this information with get_image_metadata
